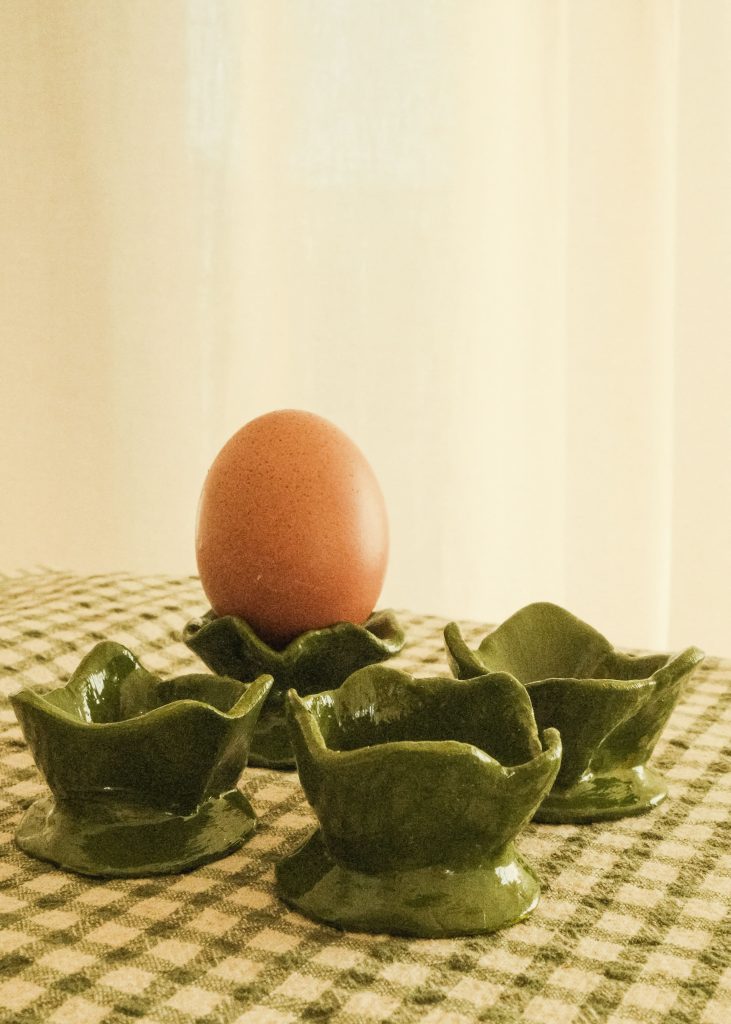
DIY: Egg cups made from self-hardening clay
Need new egg cups? How about creating your own? This little DIY project, perfect for spring, combines simplicity and creativity. Accessible to all, even without professional equipment, it allows you to make unique eggcups that are both useful and decorative. They're ideal for boiled eggs, of course, but can also be transformed into pretty containers for spring decorations, or for slipping in a few chocolate eggs for Easter. What I love about this type of creation is the charm of imperfection: each piece has its own personality... and that's exactly what makes them special. If you're tempted, follow the steps below and I'll show you how!


Material
For 1 egg cup:
approx. 100g. self-hardening clay
1 rolling pin
1 knife
1 bowl
1 damp sponge
Sandpaper
Acrylic paint
Brushes for painting
1 finishing varnish (matt or gloss)

How to make it

Step 1: The egg cup base
Take about 100g of self-hardening clay, then cut this piece into two parts, one representing about a third and the other two-thirds. Take the smaller portion and roll out with a rolling pin to a thickness of about 1 cm. Using a cookie cutter or a small glass, cut out a circle 5 cm in diameter: this will form the base of your eggcup.
Step 2: The eggcup wall
Now take your second piece of clay. Roll it out to a strip about 17 cm long and 4 cm wide, with an even thickness of about 1 cm.
Using a knife or modeling tool, cut a wavy border on one of the long sides of the strip, as shown in the photo.


Step 3: Shape the egg cup
Gently roll up the corrugated strip to form a cylinder. Adjust the length if necessary, then glue the two ends together by moistening them lightly with a little water and pressing firmly.
Then place this cylinder on the round cut out in step 1: moisten the edges at the point of contact and press gently to weld them together. You can smooth the joints with your finger for a cleaner finish.
Step 4: Modelling the final shape
At this stage, you can refine the shape of the egg cup to your liking. Using your fingers, lightly hollow out the base and edges to give it a softer, rounder shape.


Step 5: Smooth surfaces
For a polished finish, lightly dampen a sponge and run it gently over the entire surface of your egg cup. This will smooth out any rough edges, erase small marks and make the whole surface more uniform. Be gentle so as not to soak the clay. When you're satisfied with the result, leave the clay to air-dry for around 24 hours.
Step 6: Sanding down irregularities
Once the clay is completely dry, gently sand the surface with fine abrasive paper to remove any imperfections, visible joints or rough edges. This will give your egg cup a smoother, more polished appearance.


Step 7: Paint the egg cup
It's time to let your creativity run wild! I recommend acrylic paint, which is ideal for painting on clay without firing. Don't hesitate to apply several layers to achieve an even result. Allow the paint to dry for about an hour, then apply a finishing varnish. This step is essential to waterproof your piece. You can choose a matte or gloss varnish, depending on the desired effect. Another hour of drying, and your eggcup is ready.
